Filters
How to Winterize Your Jet Ski
As summer ends, it’s time to exchange our personal watercraft (PWC) for hot cups of cocoa and warm fires. After you enjoy your last ride, jet ski winterizing should be the next step to ensure that when you return after winter, you have a fully functional and clean PWC, ready to take on the new season.
Winterizing a jet ski is an essential part of your overall maintenance, and it can mean the difference between many fun-filled future summers and an expensive lesson. Knowing how to winterize a jet ski is an excellent way to ensure you can enjoy yours for many summers.
Why Is Winterizing a Jet Ski Important?
Winterizing a PWC is essential to keep it in good condition. When the warmer weather returns, you have a usable watercraft that’s ready to take on the sun and waves. When you’re using a PWC, it relies on water to keep the components cool. If you neglect the winterization process, stored water in your PWC can freeze and expand, causing costly damage.
If you live in a climate where the temperature is likely to drop below 40 degrees Fahrenheit, fully winterizing your PWC will save you time and money in the long term and ensure you can get back into the water at the first sign of spring.
Winterizing is for more than cold areas. Regardless of where you live, you may need to prepare your PWC for storage. This preparation process is almost identical to winterizing your PWC. So, you should “winterize” your PWC anytime you store it for a few months.
How to Winterize a Jet Ski
Winterizing a PWC is similar to winterizing a boat in many ways. It’s best to have a clear plan for approaching the process to avoid missing a step that results in unnecessary damage. The following steps will take you through winterizing your PWC so you can keep it in excellent condition through the colder months or while in storage:
1. Gather Your Equipment
Winterizing a PWC involves several steps, many of which require additional equipment. Before you start winterizing, use this checklist to ensure you have all the equipment you need:
- A 5-gallon bucket
- Fresh, clean water
- RV antifreeze
- A hose
- Mind soap
- Fogging oil
- Scratch-free cloths
- Wax
- Fuel stabilizer
- Gas
- Lubricant spray
- Automatic battery charger
- PWC cover or tarp
- Rags
- A safe storage space
2. Remove All Items
While enjoying your PWC, you’ve likely gathered many useful items in the storage compartments. One of the most important reasons we winterize PWCs is to remove any moisture, and leaving these items inside the compartments can cause condensation while it’s in storage.
Start your winterization process by removing all towels, sunglasses, sunscreen and anything else in your storage compartments. Wipe each compartment down and open them slightly to prevent moisture from accumulating. Consider spritzing some peppermint spray or using a dryer sheet to prevent rodents and other critters from residence. Avoid using chemical repellents to keep your watersport environment safe and natural.
3. Drain the Water
As PWCs use the water around them as a cooling system, removing it is critical for successful winterization. Depending on the make and model of your PWC, the manufacturer may have provided instructions for how to flush your system. However, you can take some simple steps:
- Tilt the front of your PWC upward so gravity can help expel the water. You can use a boat ramp, PWC lift or crates and other materials you have on hand.
- Start the engine and leave it running for about 30 seconds to keep it from overheating. Turn the throttle occasionally.
- Switch the engine off.
- Repeat the process a few times until no more water comes out.
4. Run Antifreeze Through Your PWC
If you live in a climate where temperatures dip below freezing or plan to store your PWC outside, running antifreeze through your system prevents residual moisture from expanding and cracking any components, resulting in costly engine damage. RV antifreeze is generally your best option. To run antifreeze through your PWC, take the following steps:
- Mix a gallon of antifreeze with a gallon of water in a five-gallon bucket.
- Connect one end of a hose to the flush connector and submerge the other end in your antifreeze mixture.
- Turn the engine on and throttle in short bursts until the mixture has worked through the entire system, replacing any water with antifreeze.
5. Clean Your PWC
Although cleaning your PWC is likely a big part of your regular maintenance schedule, it’s a significant part of winterization. When the weather gets warmer, and you want to get back out on the water, you want a clean craft without any moisture or friction damage. Follow these simple steps to clean your PWC:
- Remove the accessories: While you have removed the additional items from your PWC, you want to open the hood and remove any removable seats and seat covers. You want access to as much of the PWC as possible so you can remove any excess water.
- Elevate the front: However you’re lifting your PWC out of the water, you want the front elevated to maximize drainage.
- Remove the bungs: Removing and opening bung plugs drains the water from your PWC quickly. Any sand or debris can also drain easily with the bungs open.
- Spray down: Use a hose and spray the inside and outside of your PWC, ensuring no water enters the intake, coils, fuel breather and electrical areas. Ensure you clean beneath the fuel tank, coupler, motor, supercharger belt and pulley.
- Wash: Thoroughly clean the inside and outside of your PWC and wash the hull with a mild soap.
- Clean accessories: Cleaning around and underneath accessories like seats, tubs and handlebars will remove sand and other debris that collects in these areas.
- Wax the shell: Waxing protects the shell from moisture and UV damage during storage.
- Remove grime: Clean the bilge area, removing any dirt or debris.
Remove all salt residue from the seat and controls if you ride in salt water. Once your PWC is clean, thoroughly dry it before waxing, especially in hard-to-reach areas where moisture is likely to build.
6. Fill the Fuel Tank
If your fuel tank is empty, condensation can form on exposed surfaces in your fuel system. You can prevent this issue by filling your fuel tank. Add a fuel stabilizer to minimize the chance of your fuel breaking down in storage. Run the engine in 30-second intervals to ensure it mixes with the fuel.
7. Treat the Seal and Cables
Water in storage means corrosion, which can damage or compromise your cabling. Your seals may also crack as they dry. Lubricating these areas can prevent the deterioration of cables and the cracking of seals. Your owner’s manual should detail your specific PWC’s best lubricant and protectant. Ensure the cabling and seals are completely dry before applying the protective coating.
8. Protect Your PWC from Moisture Damage
Moisture damage to your engine can be catastrophic, especially if you store your PWC for long periods. Fogging oil provides a coating for your carburetor, spark plugs and other essential engine components, preventing moisture from settling in these areas and causing corrosion. Take the following steps to ensure you coat all important areas:
- Remove your PWC’s air filter.
- Turn the engine on.
- Spray fogging oil on the carburetor and spark plugs until the engine stalls.
- Remove the spark plugs.
- Spray fogging oil into each opening for a few seconds and place a rag over the openings.
- Turn your PWC on so the oil covers all the essential components.
- Replace the spark plugs and air filter.
This step also lets you inspect the engine and make plans to replace the necessary components before next season.
9. Remove the Battery
If you leave your PWC battery connected, it’s likely to drain while in storage. You may find you can’t start your PWC when you return to ride after a long winter. Allowing the battery to drain entirely also impacts its useful life, so you’ll need a replacement sooner.
Disconnect your battery for the winter to ensure you can get back out on the water. Start with the negative terminal, then the positive and remove it from the PWC. Ideally, you should store it connected to an automatic trickle charger. Avoid placing it on concrete and keep it away from flammable items. It’s also essential to store your battery indoors, where the temperature will stay above freezing.
10. Cover the Exhaust
Your exhaust could be the perfect home for bugs, rats or other critters looking for a warm winter home. Ensure you cover your exhaust and any other openings that would be attractive to unwelcome guests. You can choose from several materials, including dryer sheets and steel wool. The aim is to provide a physical barrier. Some materials also act as a deterrent, preventing them from trying.
11. Place Your PWC in Storage
One of the most critical steps in the winterization process is finding a safe space to store your PWC. Regardless of where you keep your PWC, always cover it first. You can purchase purpose-made PWC covers or use a tarp, provided it prevents dust, moisture and debris from settling on your PWC. Remember, your PWC is full of gas, so avoid storing it near flammable substances or in your home as it emits potentially harmful fumes.
Storage Options for PWCs
Long-term storage in the water can damage your PWC, mainly if you ride in salt water. Long-term water storage can decrease the life span and value of your PWC. After it’s been in fresh or salt water for a few months, it can be home to crustaceans, algae, dirt and grime.
The solution, known as dry docking, provides excellent storage options that enhance lift and access for maintenance during storage. You can store it in one space, away from the elements and any potentially damaging bumps during mooring.
While water storage is a short-term summer option, you have several winter storage options for your PWC. Your choice depends on your unique circumstances and personal preferences. The two most common PWC storage options include:
Trailer Storage
Storing your Jet Ski on a trailer has several advantages, including easy portability and maintenance. It’s best to remove the trailer wheels and find a space protected from the elements. You’ll also need to transport your PWC to your storage space and back again at the beginning of the new season.
Typical places to store your PWC and trailer include your garage, backyard or shed. You can also consider indoor storage units if you have limited space at home and are happy with the additional storage costs.
Port Storage
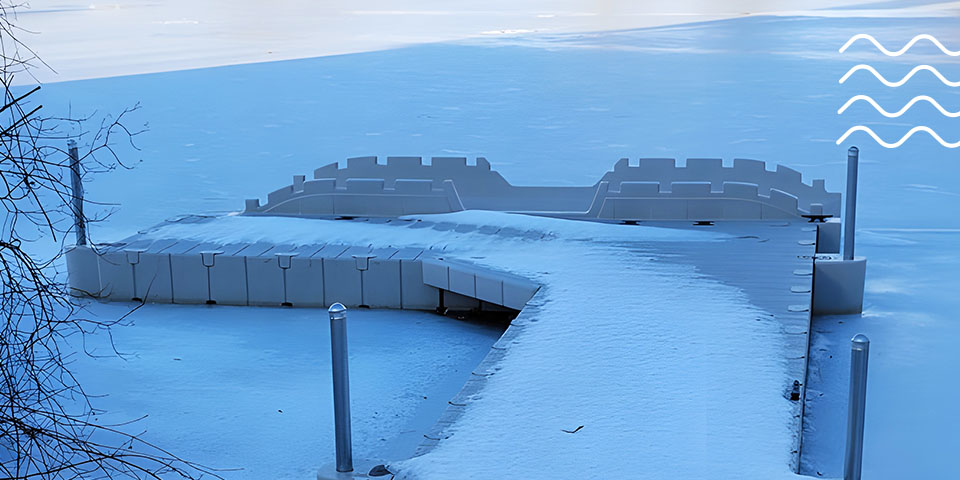
If you prefer not to use a trailer or live on a lakefront property where port storage makes sense, it’s an excellent option. Commercial marinas offer a range of storage options, from floating docks to indoor dry rack storage. Waterfront homeowners also have options. You can use a PWC lift or floating dock option, ensuring easy maintenance access and avoiding any storage fees.
Your PWC will be outdoors, which could risk damage from the elements without proper winterization. You may also need to invest in additional dock space, but doing so has many benefits besides storage space, including safety and entertainment. You’ll need a PWC lift to get your PWC out of the water and safely onto the dock, which you can add to your floating dock with minimal fuss. From there, you can winterize, cover and store your PWC all in one place.
How to De-Winterize a PWC
At the end of the winter, you’ll be thrilled to get your PWC going again. After all the effort of winterizing your craft, it makes sense to take the same care in preparing it for the new season. Keep the following steps in mind, and you’ll be riding again in no time:
- Do an inspection: Despite your best efforts, you should still inspect your PWC before riding. Check for damage, indications or wear, cracks and any loose components.
- Install the battery: If you stored it over the winter, it should be fully charged when needed. Check it with a battery tester to be safe, then secure it and clean and grease the leads. Attach the positive cable first, then the negative.
- Check the engine: Ensure your engine is in good condition before you get out on the water. Check the engine oil is level and that none leaked out during winter storage.
- Flush the engine: You can attach a garden hose to the flushing port. Turn the water on and start the engine. Run it for about two minutes to ensure everything works correctly, and check the engine compartment for leaks.
- Lubricate: After prolonged storage, it may be worth lubricating any metal parts with the preferred lubricant in your owner’s manual.
- Clean: Your PWC may not need cleaning, but hosing it down will remove any dust or debris that settled there over the winter. If it requires a thorough cleaning, follow the same steps as you did before storing it for the winter.
Contact EZ Dock for a Floating Jet Ski Port Today
When you have an asset like a PWC, you want to keep it functioning for many summers. If you’re wondering if there’s anything else you can do to help improve the longevity of your WaveRunner, Sea-Doo or Jet Ski, consider installing an EZ Dock PWC port.
Our one-of-a-kind design is purpose-built to help you dock your PWC with minimal fuss. Loading and unloading are more straightforward than ever. Our PWC ports use adaptable rollers and split entries to increase convenience and provide a sustainable, aesthetically appealing docking solution. Request a quote today and learn more about our PWC ports and other products designed to make your life on the water more memorable.

